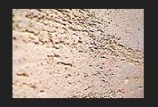
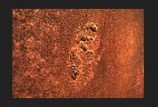
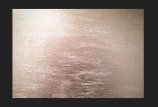
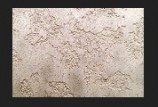
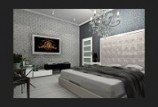
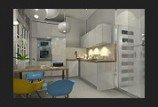
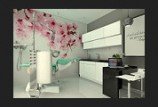
Velatura effect obtained with Lumicca paints based on acrylic Murimal 200 priming paints gives an amazing light effects. The color of walls in this effect depends on the chosen color of the Murimal paint, and the transparent Lumicca paint are responsible for color of glare and reflections. Overall, this effect is best visible with the appropriate lighting, thus is often used in connection with architectural lighting. Characteristic flares can also bring out the rays of the sun because the effect is highly variable – its reception depends primarily on the light because it only brings out the effect of transparent Lumicca paints.The technique of applying of Velatura paints is in this case similar to the technique of applying the Guantato effect, but here, transparent paints are used and in addition are used singly. However, the similarity are the obtained patterns, with the difference that here without proper lighting the patterns will be looked pale.
Is it difficult to apply such a finish by yourself? Theoretically no, but in this case there is no way to improve the error and the primer color layer likes to cause an unpleasant surprises, especially if it is improperly applied or not completely dried up, so to create the Velatura effect with Lumicca paints on the colorful Murimal 200 you need to have some skill and artistic sense. Without them it remains only to ask for the assistance of an experts, which is not at all a bad idea, considering that the effect will be visible for many years.
WHERE TO TAKE VELATURA EFFECT?
Velatura effect can be described as a very strongly variable – the way it will be seen depends primarily on the amount and direction of the light, and this allows for finding the best applications for this type of finish.
- Children’s Rooms, where volatility is always desirable. Velatura effect can fascinate even die-hard realists, so children will feel really great in an environment that changes with the time of day.
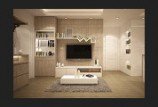
- Beauty, especially when combined with appropriate lighting. It allows you to bring out of the Velatura effect its incredible beauty and elegance in all shades of madness. Irregular, sharp, but not too flashy designs are something that will emphasize the individual character of the living room or office.
- Staircases, corridors and halls, which, thanks to the glow coming from Lumicca Pearl paint will become brighter and less overwhelming. It is good to reach for this effect also in the atmospheric or the quiet hotel restaurants.
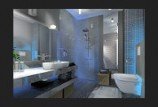
- Kitchens and bathrooms are perhaps a bit non-standard uses, but in the modern interiors this rooms are large, redecorated with an idea, an intention and an interesting plan – additional lighting effects, a few pieces of good lighting and room in the blink of an eye can change into a completely different, yet beautiful one.
WHY LUMICCA PEARL?
Theoretically, all transparent paints are suitable to create the Velatura effect, but there are several reasons why you really want to invest in Lumicca pains.
- This paint are flexible and therefore damage resistant.
- You can wash them with detergent, so refreshing of the walls is simple.
- The surface is smooth and slippery. Therefore this paints does not attract dirt and dust – a lot of time passes before the wall covered with Lumicca Pearl will need to be cleaned.
METHOD OF APPLICATION
- Work should begin with the preparation of the substrate. It must be cleaned and primed with the right preparation, selected appropriately depending on the type of substrate and its condition. Primed surface should be allowed to dry completely.
- Apply two layers of Murimal 200 paint on the primed surface. The layer put on the wall has to be thin and flat on the entire surface. The first one should dry for six hours, the second by 12 hours, so that it will not get damaged during further works.
- Decorative layer of Lumicca Pearl paint diluted with 30% water is applied in several stages. First, you need to cover the surface with very thin layer of on an area of about one square meter, and then use gloves or euromal wipe the transparent paint all over the surface of the wall. Of course, for large areas you need to create some of these “start poles”, but being careful not to apply anywhere accidentally the second layer of paint – coverage should be uniform and flat. The drying time of this layer is about 12 hours and after that time all the visual effects will be fully visible (some of the traces may be difficult to see earlier).
[show_gallery images_in_a_row=”4″ galleryid=”378″][/show_gallery]


